Overview
Directory synchronization is supported for Microsoft Entra ID (previously Azure Active Directory).
If you want to connect other directories that support the SCIM protocol, please contact our support team.
Synchronization strategy
Manual provisioning
Use EntraID to assign users to your SignPath organization.
Hybrid user management
You can keep using the user management functions in SignPath to create and manage users even when synchronizing with Entra ID:
- Manually created groups can contain synchonized groups and users too.
- Some organizations prefer to not synchronize user accounts with certain global roles.
Synchronized users and groups cannot be edited manually.
Provisioning with synchronized groups
Instead of assigning users directly to your Entra ID enterprise application, you can create one or more groups and assign these groups. You can also use these groups to assign global roles in SignPath.
Limitations:
- Each user can only have one global role other than Regular User. If you assign a user to groups that result in multiple global group assignments, provisioning of that user will fail. See Troubleshooting.
- Nested groups are not supported for provisioning and role assignment by Microsoft by Microsoft Entra. See the official Microsoft documentation on scoping.
Assigning project-specific permissions with synchronized groups
You can assign synchronized groups to project and signing policy permissions such as Configurator, Submitter or Approver.
Unlike provisioning, nested groups work fine in this scenario, so you can reference existing Entra ID grous
Synchronization notes
User synchronization:
- In the default mapping configuration, Entra ID users are initially mapped to SignPath users by comparing the following attribute values:
- First, the
externalIdattribute configured in step 5 - Second, the
displayNameattribute
- First, the
- When an Entra ID user is removed from all groups that are synchronized, the SignPath user will be deactivated.
Group synchronization:
- Groups are initially mapped using their
displayNameattribute. If a group does not exist in SignPath yet, it will be created.
After users and groups are synchronized the first time, Entra ID will match them using their unique IDs.
Configuration steps
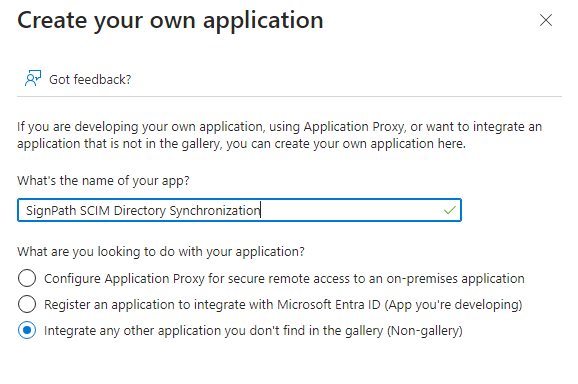
1. Create a new enterprise application in Microsoft Entra ID
In the Azure Portal, go to Microsoft Entra ID / Enterprise Applications and create a new application. Select “Create your own application” on the top.
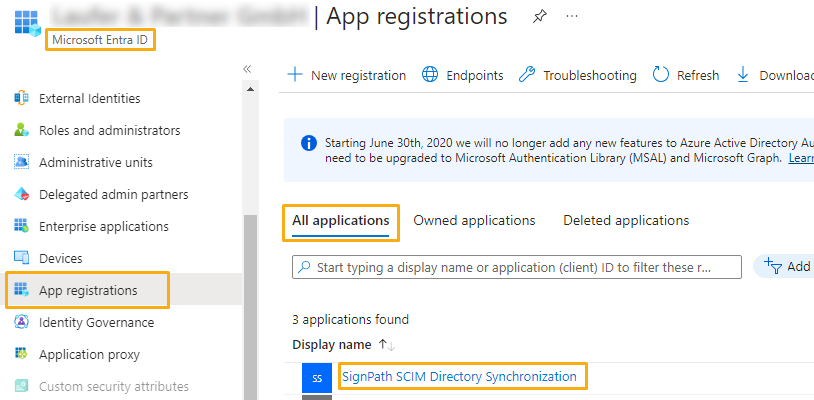
2. Define SignPath application roles in the application registration
Go back to the Microsoft Entra ID main page, select App registrations, change the list to All Applications and find the application registration you just created.
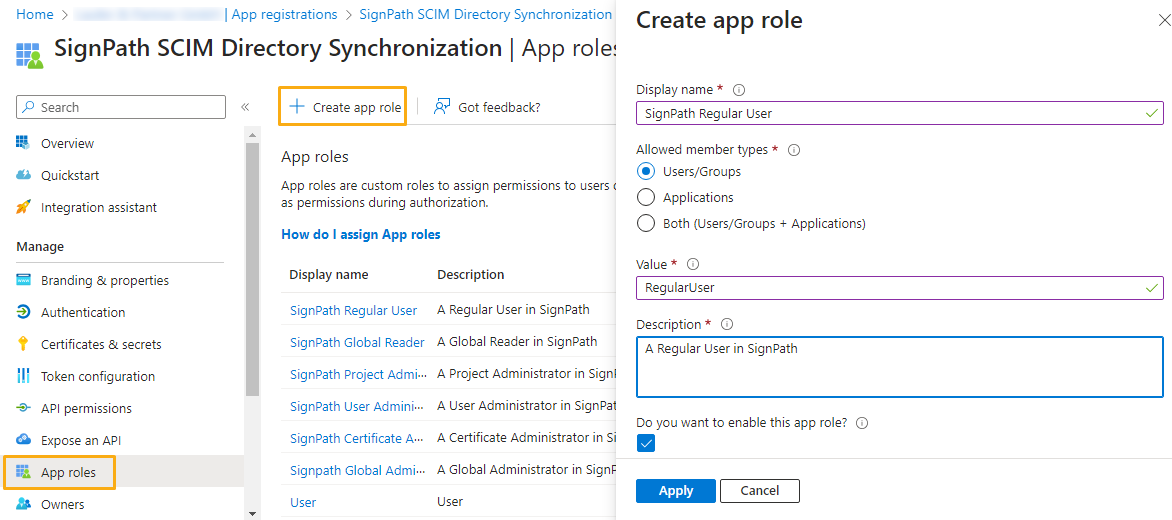
Go to App roles and create an entry for each role in SignPath using “Users/Groups” as allowed member types:
| Display name | Value |
|---|---|
| SignPath Global Administrator | GlobalAdministrator |
| SignPath Certificate Administrator | CertificateAdministrator |
| SignPath User Administrator | UserAdministrator |
| SignPath Project Administrator | ProjectAdministrator |
| SignPath Global Reader | GlobalReader |
| SignPath Regular User | RegularUser |
Note: For more information about the permissions assigned to each role, see the user documentation.
3. Create a synchronization user in SignPath
In your SignPath organization, create a CI user, remember the Api Token and change its role to Directory Synchronizer. This user will be the service account in SignPath that creates/updates the user and group entities.
4. Configure provisioning for the enterprise application
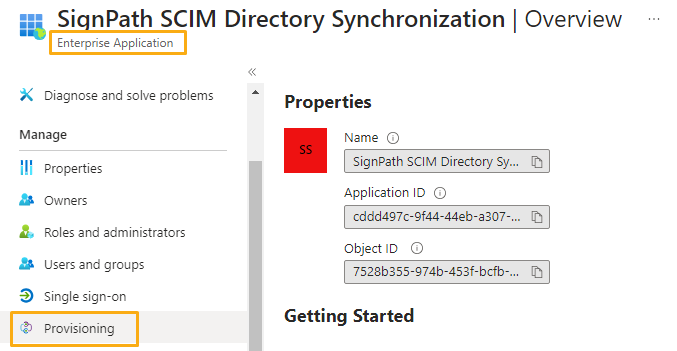
Go back to the Microsoft Entra ID main page, select Enterprise applications and select the application you have created in step 1.
Go to Provisioning and click Get started, then enter the following settings:
- Use Automatic for the Provisioning mode.
- Enter
https://scim.connectors.signpath.io/scim/<your-organization-id>/dry-runas a Tenant URL. - Use the SignPath CI User API token from step 3 as the Secret Token.
Dry-Run mode
By specifying the
/dry-runpostfix in the Tentant URL, you tell the SignPath connector to only simulate the updates/changes, but not perform any write operations. We recommend testing the setup with this configuration and to remove the/dry-runURL segment when done (see step 7).
Click “Test connection” to confirm that the configuration is correct. When successful, save the provisioning settings.
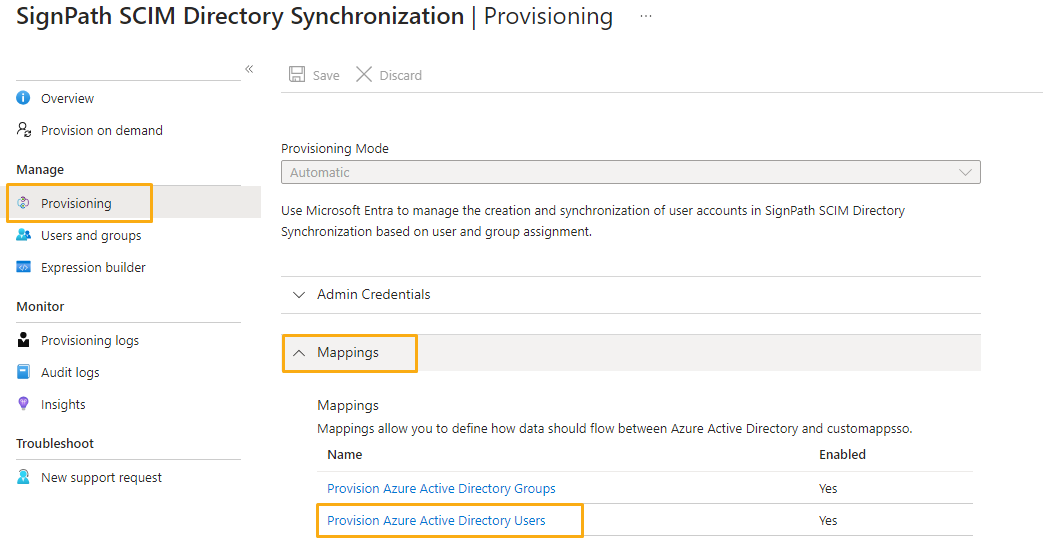
5. Configure provisioning mapping for the enterprise application
Close the dialog, select Provisioning, open the Mapping group and click Azure Active Directory Users.
On the next page, check Show advanced options and click on Review your schema here.
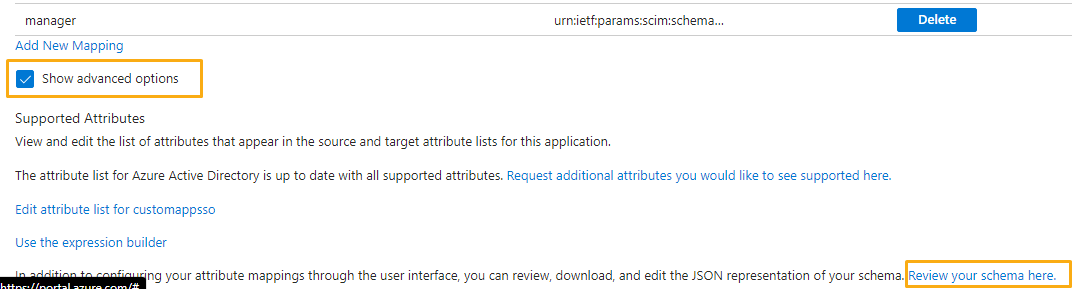
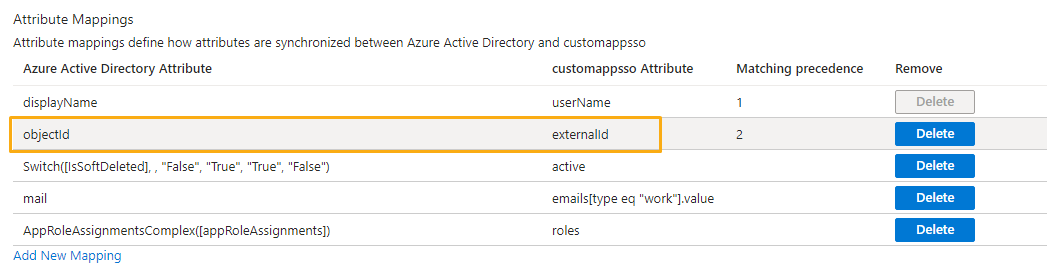
Then, replace the existing JSON with the one from this link and save the schema. After closing the dialog, you need to refresh the Azure page, then the Attribute Mappings will be pre-filled for you. Click on the row that maps to “externalId” in the customappsso Attribute column.
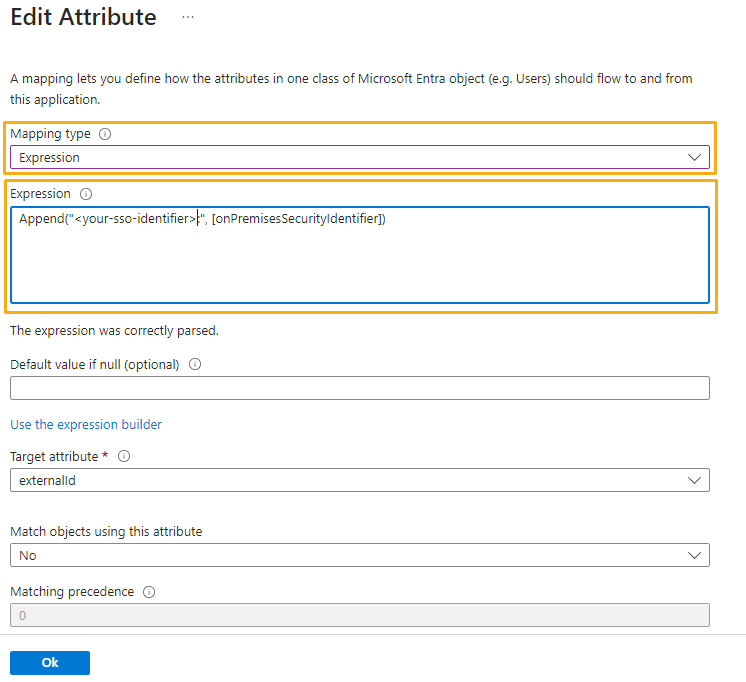
Change the Mapping type to “Expression” and enter the following expression: Append("<your-sso-identifier>:", [objectId]).
Mapping expression
To find out the value for
<your-sso-identifier>:, open an exising user in SignPath. In the Identity field, everything before the first:is your SSO identifier.
In order for SignPath to be able to map your Microsoft Entra ID users correctly, the second part of the SignPath Identity (after the
:) should map to the respective field of the Microsoft Entra ID user. If you are mapping your Microsoft Entra ID users directly, you can use[objectId]. If you are forwarding yoursidfrom your Active Directory, use[onPremisesSecurityIdentifier].For details on how the expression system works in Azure, see the Microsoft reference for writing expressions for attribute mappings.

After saving the mapping, you can now test your configuration.
6. Test the configuration
Go back to the Entra ID main page, select Enterprise applications and select the enterprise application you created. Select Users and groups and click “Add users and groups”.
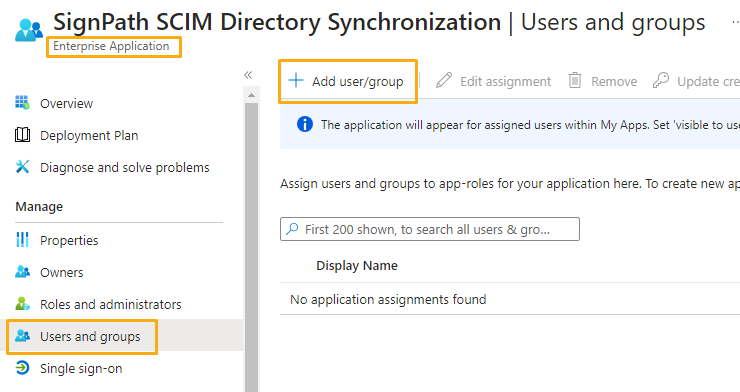
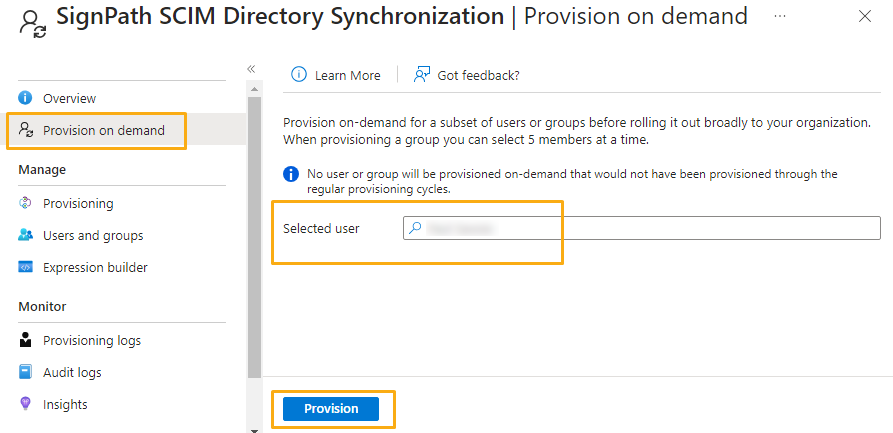
Select a test user that already exists in the SignPath organization and assign them a role. Then select Provisioning on the left pane and Provision on demand on the next screen. Select the user you just added and click “Provision”.
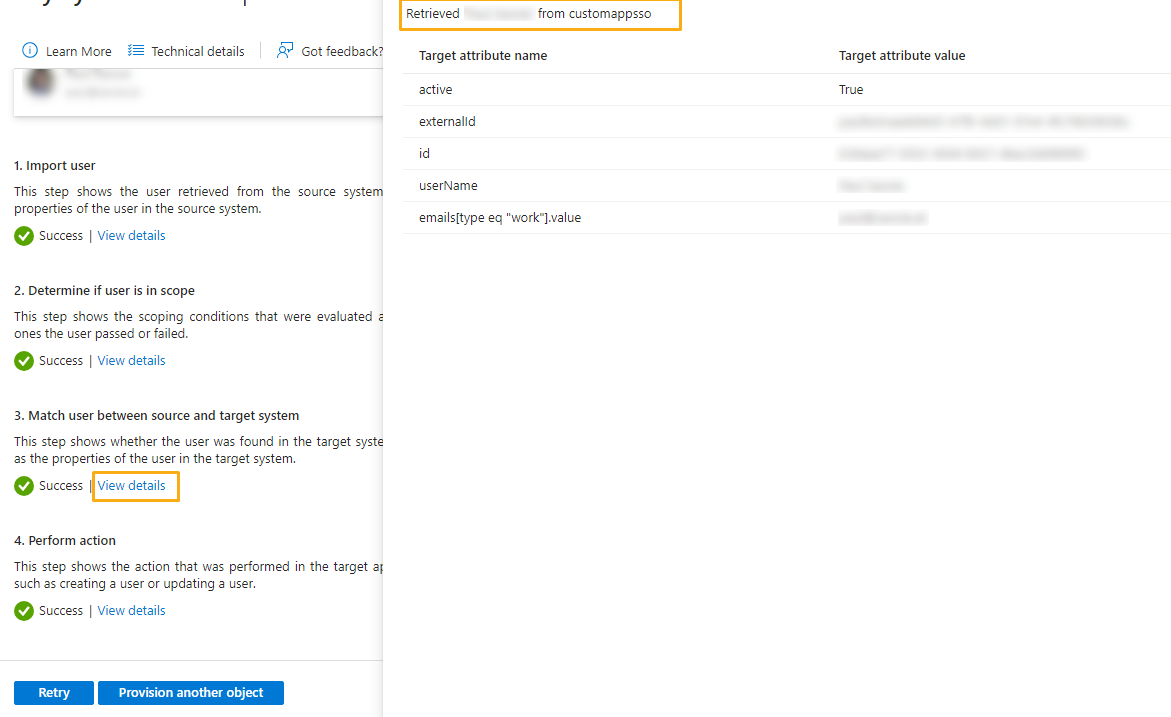
When the provisioning succeeded, click on “View details” in section 3. Match user between source and target system. The synchronization should have found an existing user in SignPath that matches. If it attempts to create a new user, there is an error in the configuration.
7. Remove the /dry-run postfix, assign users and groups, and start provisioning
After you successfully tested the configuration, you can remove the /dry-run postfix of the Tenant URL that was entered in step 4. Afterwards, you can start the provisioning on the Overview page of the provisioning settings The assigned Entra ID users and groups will then be synchronized to your SignPath organization.

You can now assign all users and groups that you want to synchronize.
Troubleshooting
All synchronization attempts can be viewed in the Enterprise Application under Provisioning logs.
Please note that some items may take a couple of hours to be synchronized.